This post will help you with Step by Step Procedure of KVM Installation on Ubuntu.
We can use KVM – kernel-based virtual machine – to run both Windows and Linux in virtual machines.To understand the basics about, what is KVM Virtualization and its terminolgy, click here.
Does your machine actually support virtualization?
KVM only works if your CPU has hardware virtualization support – either Intel VT-x or AMD-V.
To determine whether our CPU includes these features, run the following command:
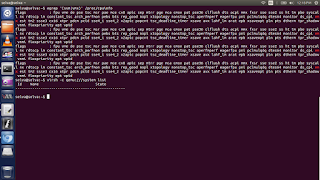
If the output from your machine is similar to the below output then we're good to go.
If you are interested in learning, Request you to go through the below recommended tutorial.
DevOps Full Course Tutorial for Beginners - DevOps Free Training Online
Docker Full Course Tutorial for Beginners - Docker Free Training Online
Kubernetes Full Course Tutorial for Beginners - Kubernetes Free Training Online
Ansible Full Course Tutorial for Beginners - Ansible Free Training Online
Openstack Full Course Tutorial for Beginners - Openstack Free Training Online
Step by Step KVM Installation on Ubuntu
Step by step instruction as document and video is available in this article.Does your machine actually support virtualization?
KVM only works if your CPU has hardware virtualization support – either Intel VT-x or AMD-V.
To determine whether our CPU includes these features, run the following command:
root@ubuntu:~$ egrep '(svm|vmx)' /proc/cpuinfo
If the output from your machine is similar to the below output then we're good to go.
Install KVM on Ubuntu using apt-get
we now need to install some packages using the apt-get as below.root@ubuntu:~$ sudo apt-get install qemu-kvm libvirt-bin ubuntu-vm-builder bridge-utils
Verifying the KVM Installation:
We can test if your install has been successful with the following command:
root@ubuntu:~$ virsh -c qemu:///system list
Id Name State
----------------------------------------------------
Sometime You may face some issue. if so, just using the below fixes.
root@ubuntu:~$ virsh -c qemu:///system list
libvir: Remote error : Permission denied
error: failed to connect to the hypervisor
root@ubuntu:~$
you probably want to fix this before you move on. The critical point here is whether or not you have write access to /var/run/libvirt/libvirt-sock.
The sock file should have full permissions, so give full permission to the file.
Install virt-manager (graphical user interface)
If you are working on a desktop computer you might want to install a GUI tool to manage virtual machines.root@ubuntu:~$ sudo apt-get install virt-manager
Virtual Machine Manager will appear in Applications -> System Tools menu. First create a new connection to local QEMU instance from File -> Add Connection menu. Localhost (QEMU) or QEMU/KVM should appear in the virtual machine list.
When you open virt-manager, if you are getting any warning popup as some packages need to be install, just give "yes" to install.
Thats it, we are done with KVM installation on Ubuntu successfully.
We will explain you how to create a virtual machine on KVM in the upcoming article.
Related Content on Linux might be useful to you to improve your Linux Skills.
How to Configure IP Address on Ubuntu using Netplan
How to Access Linux Server from Windows Remotely
Configure SSH Passwordless Login Authentication (SSH-keygen)
How to Create LVM Partition in Linux – LVM Tutorial
Install & Configure Samba Server on Linux (RHEL7 / CentOS7)
How to Access Linux Server from Windows Remotely
Configure SSH Passwordless Login Authentication (SSH-keygen)
How to Create LVM Partition in Linux – LVM Tutorial
Install & Configure Samba Server on Linux (RHEL7 / CentOS7)
Keep practicing and have fun. Leave your comments if any.
Support Us: Share with your friends and groups.Stay connected with us on social networking sites, Thank you.

